
Drafting Mannish Collar
 2 styles collar with separate stand Illustration shows collar with 1” stand at center front and 1-3/8” stand at center back.
1) collar band trace front,; then draft collar as follows: a to b – draw straight line. b to c – square a line up 1” for center from stand. c to d – equals line a to b plus back of neck. d to e – square a line down 1-1/2” for stand in center back.
2) e to f – square a line from e to shoulder. f to b – connect. b to g – extend line 5/8”. g to c – draw a curved line.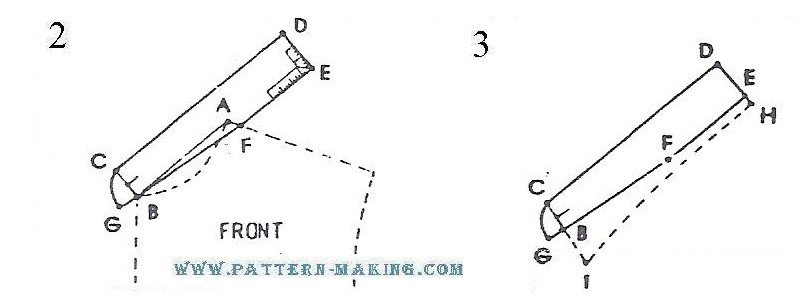
3) outer collar d to h – equals d to e plus 3/8”. c to i – about 2-1/2”. draw straight line through b. h to i – first square line at h; then connect to i.
4) divide the outer collar section into 3 equal parts and mark them j, k and l. slash from lower edge up and spread about 1/8” at each slash, as illustrated. this allowance is for ease over the shoulder.
5) allow seams on all edges but center back; then make corresponding notches.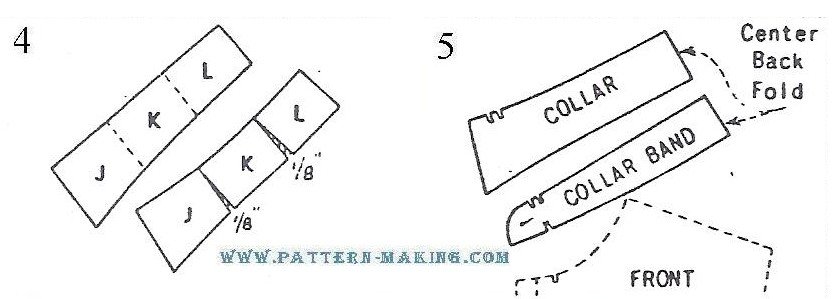
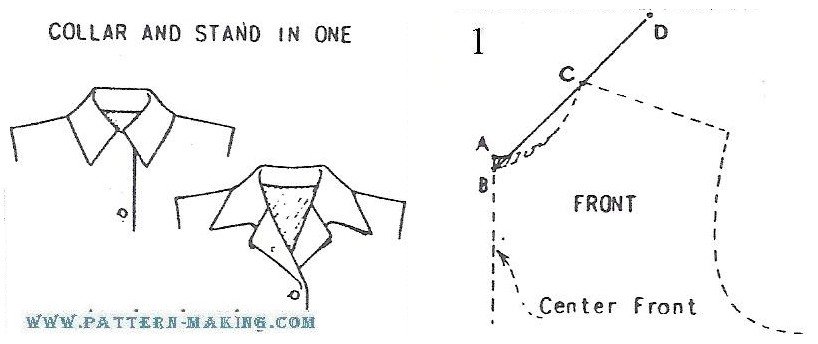
collar and stand in one
illustration shows collar with 1” stand at center back.
1) trace front; the draft collar as follows: a to b – 1/2″, for lower neckline b to c – draw straight line. c to d – continue straight line from c to d for back of neck (3”).
2) trace curved neckline between b and c to opposite side of straight line.
3) d to e – 1”. this equals stand in center back. draw lines d to e and from e to curved line with the square, as illustrated. d to f – equals d to e plus 3/8”.
4) b to g – about 2-1/2” long, with point g 1” away from center front.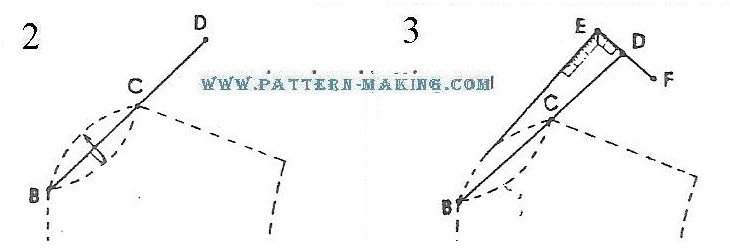 f to g – first square a line at f; then connect to g.
5) slash collar in two places and spread, as illustrated. this allowance is for ease over the shoulder. allow seams; make corresponding notches at neck edge.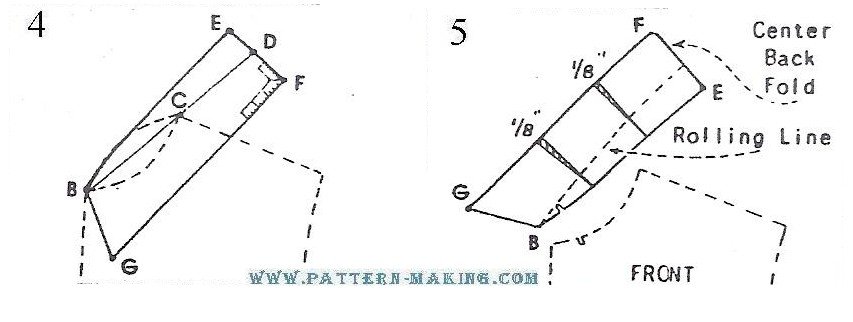


Comments are closed.